Monday, January 30, 2012

Mail Boxes Are Fun!

My son LOVES to get mail. Luckily he has a Nana who loves to send him mail. My son also HATES to write. Let me clarify, he hates to write correctly. HiS SentenCeS uSuALLY Look LiKe tHiS. Add to that the "s" is usually backwards. Now, last year, that was fine. In Kindergarten, I was just happy that he was actually writing. However, (another fancy word for "but," hehe. See this post if you don't get the joke.) As a first grader, he needs to be writing his letters correctly and using the correct cases. To help encourage him to practice outside of his school work I decided to make a mailbox for our house so we can "mail" each other letters of encouragement. Two birds with one stone. He gets to practice writing and learn how to encourage others at the same time. Once a week we designate a "mailman" to deliver the letters to our individual mail boxes outside our bedroom doors.

Now let me tell you the best part, this project was done for FREE! All I used was a box, glue, tape, and ribbon. All of these I had in my house and therefore cost nothing! If you don't have these items on hand the entire project will only cost a few dollars.

Before we begin, let me show you the final project.
Pretty, isn't it. Now let me show you how I did it. There may be an easier way, but this is what I did.
First I found a heavy cardboard box in the size I wanted. Luckily, Bubba's school supplies had come in a few days prior and it was the perfect size.

After playing around with the box, I decided that I didn't like the tape on the outside of the box and pulling it off pulled too much of the box with it. (Darn you industrial strength packing tape!) So, I decided to turn the box inside out. Unfortunately, I forgot to take a picture of this, but I trust that you know what I am talking about. I started by finding the seam, where the box was glued together by the box makers. I carefully pulled this apart and turn the box inside out. Then glued the seam back and reinforce with packing tape. I used plain old Elmer's Glue which is why I reinforced it with tape. If you use a stronger glue you may not need to use the tape.
Next, I glued the bottom of the box together, as if I were going to ship it, not closed together like in the picture above. I used two very good and very heavy books to press the flaps together until the glue was dry.


OK, I'm stumped as to why this picture keeps loading upside down.
But, you get the point, right?
In this picture, you can see how the box is now inside out. (Side note, these are both very good books! I can't wait until my kids are old enough to read them! Also, I just love the image of Aslan on the Narnia book!) After the glue dried I needed to figure out how to do the same thing to the other side. Thank you God for cameras, because I don't think I could explain this next part accurately for you!

 First, I propped Harry on his side (because he was the hard cover book and would stand up better. Then, I glued the two side flaps down onto ONE end flap. This is important if you would like to get the mail out of your mail box!


I then put Narnia on top of the flaps to secure the flaps together while the glue dried. (Remember, Harry is under there so Aslan is safe and won't fall through!)

Once the glue was dry, I cut out sections of the side flaps so that you can reach into the box. Think of a Post Office Box on the side of the road. This is the part the mailman opens to retrieve the letter you placed in there.


Once the glue was completely dry I removed the two books and puncture holes into the bottom flap and the back of the box (the side flaps) so I could insert a ribbon to hold the box closed.
I also made two little cardboard buttons to keep the ribbon from pulling through the holes. First I strung the ribbon through the button holes and tied a huge, ugly knot. Then, I strung the ribbon through the bottom flap of the box. Next, I strung the ribbon through the big hole that I cut out in the previous picture and back through the other punctured hole. I did the same on the other side and tied a pretty little bow.

Now to the front of the mailbox. I decided how big and where I wanted the mail slot to be. Using a pencil and ruler for a guide I marked a long rectangle. Then used an exacto knife to cut three sides of the rectangle to make the slot.

I wanted Bubba to help me with the next step, but as you can see from his head in the background of the previous two pictures, he was busy with his own project, so I continued on my own. I painted the whole thing blue. It took two coats and a lot of drying time, but when it was done it looked like this.

 I did remove the ribbons when I painted the box and buttons. I also used a light pink ribbon which I may change later to whit so that it matches better, but I had pink already.

Finally, I decorated the front of the box to look like a typical mail box. So, once again, the finished project.

I am rather happy with the result. It sits on one of my kitchen counters with paper and pens nearby.

Now you may be thinking, "This is great! But, what about the individual mailboxes?" Or did you already forget I mentioned those? Don't worry, They'll be featured in an upcoming post. So check back soon. Or better yet, subscribe!

Thursday, January 26, 2012

New Year, New Look

Hello to all of my wonderful readers! After taking some time off from blogging for the Holidays, potty training The Little Princess, and then battling pneumonia, I'M BACK!


Santa was good to us this year!

That's a drum she's sitting on.
I'll spare you a photo of me sick. Instead, here's a picture of Bubba.

He just lost his first tooth!
I realize it's January 26th and it's quite a bit late to start talking about New Year's resolutions, but (and as my father says, "but" means forget everything I just said) I'm going to give you my two cents about New Year's resolutions. Personally, I never make them. Perhaps it the passive aggressiveness in me, but I'm not going to make a plan to change my life just because everyone else is. Besides, from what I've seen people who change their life based on the date on the calendar rarely hold to those goals. If you are one of the few who are still following through with your resolution, Great Job! You have more will power than most of the world. I prefer to wait until I am ready for a change, then I actually follow through. (I'll get off my soap box now.)
That being said (isn't that a fancy way of saying "but" and we've already discussed what "but" means), I did  a lot of research while I was sick on blogs and decided it was time to update my look. What do you think? I like it.

Now earlier I did say that today was January 26th, right? That means today is a very special day. After all January is a very special month. It is National Mentoring Month, National Thyroid Disease Awareness Month, National Birth Defects Prevention Month, National Stalking Awareness Month, Geek Appreciation Month, and many, many more. But most importantly, it is the month I chose to get married. Today just happens to be my husband and my tenth anniversary! Ten years being married to the most wonderful man in the world.

Ten years ago today.
I knew he truely loved me when I picked our wedding date and we booked everything before he told me that the weekend I chose happened to be Super Bowl Sunday! Then, his Pats were in the the Big Game! He didn't even ask to watch the game! (To all other football widows out there, you know that is love!) In ten years, while I haven't learned to love football, I have watched many games and this year the Pats are once again are going to the Super Bowl. Perhaps this means they will win again?
Wow! What a post, New Year's resolutions, the definition of "but," my wedding anniversary and the Super Bowl all in one post. Wait ~ no crafts? I thought you were the Crafty Princess? Well, yes, I am. BUT, occasionally I hope you will indulge me in a run on sentence, tangent filled blog post! More crafts to come, I promise!

Cheers!


Tuesday, December 27, 2011

New Year's Eve Poppers

I hope everyone had a Merry Christmas! We did here at The Crafty Princess house! My living room is still a mess from all the new toys, but I love it! Now to set our eyes on New Year's Eve. This year, Bubba is old enough to get the concept of a new year (he just recently turned six) and I plan on taking every opportunity to make this year's celebration special. First on the agenda, Poppers! Some people call them crackers, but that has a very different meaning in our house, especially when The Little Princess is around. (Hello, favorite food!) I've never made poppers before but I figured they wouldn't be that difficult. First, since there are four people in our family, I went digging for four toilet paper rolls. Literally digging in the trash. Lucky for me Hubby forgot to take the bathroom trash out for trash day yesterday. (Usually a bad thing but in this case I had four toilet paper tubes in there! Bingo! Hubby you are now out of the dog house!) 
Yup, mine look just like yours.
After removing all the little pieces of tp that were stuck to the tube I cut them in half.
Am I being too thorough with the photos?
Nah, you can never have enough photos!
Next I cut a bunch of strips of tissue paper to put into the poppers.
Oooh, pretty!
Now, after experimenting with different methods, I decided I wanted to have a bottom to my tubes, so I could stuff the tissue paper into them without worrying about the paper falling out of the bottoms while I was working with the poppers. (Here's where I get real high tech.) I cut a piece of tissue paper in the color I was using for the popper, in a square large enough to cover up the sides of the tube. Then, (this is the high tech part.) I used a glue stick to stick the paper to the tube. (What? A glue stick isn't high tech? Then why doesn't the glue stick to the plastic tube? Hehe. OK, I spend too much time with small children....)
OK, I really don't know what happened to the top half of this photo.
For some reason it won't load. But, you get the idea.

Next, I stuffed the two halves of the tube with tissue paper strips and a few pieces of candy. (What kind of candy? Reused Christmas candy of course. We don't need even more junk in the house!
This is when I started fending Bubba off from the candy.
"It's ten a.m.! You can have a piece after lunch!"
"Aww, Mom!"
Next I cut a piece of tissue paper large enough to wrap one and a half times around the tubes and just long enough to go from the end of the tube to a few inches past the bottom. (Confusing, I know. That's why I take pictures!)
I did this to add strength to the "pulling" part of the popper.
If you are using a different kind of paper you may not need to do this step.
 Then, I cut a piece of tissue paper long enough to wrap one and a half times around the tubes and long enough to connect the tubes together, leaving enough for the "pulling" part of the popper.
We're almost done. Let's wrap this up!
Please excuse the scissors.
At this point the tubes decided it would be a great time to get camera shy and roll away.
 Next, gently twist the ends so it looks like this.
Looks like a great big piece of candy!
Finally add some ribbon to tie off the ends.
Oooh, Aaah, Pretty!
Here are all the others I made. One for each of us in our favorite colors. You could easily make them in colors to match your party theme. 
Don't you just want to make a whole bunch?
These were a lot of fun to make, and fairly simple. (Seriously, it took longer to write the blog than make all four of these.) I was going to let Bubba help me, but he was too busy playing with his new toys. He has already asked if he can pop one though. I guess I'm going to have to hide them for the next couple of days!

Thursday, December 22, 2011

Leg Warmers

Next week it begins ~ potty training The Little Princess. (Did I really just say that? How is that possible?) When I trained Bubba I had no idea what we were doing and it took almost six months. I do not want to go through that again! To the web! (Research, research, research). I decided we were going to do it cold turkey this time. Next Monday, no more diapers (except at bed time). She'll be in her big girl training pants only from the waist down. However, it being December, I was concerned about her legs getting cold. To the web! I found a bunch of great tutorials on how to make leg warmers for toddlers out of knee highs. One quick trip to the local dollar store and $4 later I had the beginings of four pairs of leg warmers.


This is what I started with.


I began by cutting the foot, heal and toes off of the sock.


Now take away the pieces we won't be using.


Now put the long piece aside and trim the smaller piece on the two long sides. (I didn't measure. Just cut off enough to separate the pieces.) This will give you two pieces instead of one tube. (You can skip this step, it will just make the cuff bigger. I wanted it to be a little smaller.)


Next place right sides together and faux serge (use the zig zag stitch making one stitch on the fabric and one stitch just off the fabric) on your sewing machine and stich the length of the two longer sides. Once again making it a tube, just a narrower tube. (If you skipped the above step, then you would skip this step too, obviously.)


Now you should have something that looks like this.


Now turn it in on itself so wrong sides are together.


If you want, you can faux serge the edges together as before.


Next turn the long piece you put aside inside out so that right sides are together. Mark each piece at the sides, the center front and center back, and once more between each pin. (Making a total of eight pins in each piece.)


Place the smaller piece inside the larger and line up the pins. Pin the two pieces together where the pins lined up.


Note: Place pins on the inside as shown rather than the outside. It will make it easier when sewing. (Don't ask me how I know!) Back to the sewing machine!


Slowly and carefully faux serge all the pieces together. (If you serged the cuff together it will be two pieces, if you did not it will be three.)


Turn the leg warmer right side out and you finished your first leg warmer.


Now repeat (or do both at the same time) and you have a pair of leg warmers. I made a total of four pairs.


Hopefully this will be enough. I'll be doing a load of big girl underpants everyday anyway, so these can get washed everyday too. (If my directions are confusing try Blooming Bums, The Towells or Moments of Mommyhood.


Pray for us next week! :-)

Friday, December 16, 2011

Shaggy Bath Mat

After completing my light switch plate, I decided I wanted to do more for my (almost completed) bathroom. So I spent the last two days making a bath mat. We have been using towels on the floor and I was getting tired of my good towels getting ruined. Therefore, to Pinterest! I found a great shag rug made from old t-shirts at Rags By Sock Monkey. However, hers is a no sew mat. And she recommends washing it in a lingerie bag on a delicate cycle. Being a mom, and knowing this was going into my bathroom and therefore was going to be washed and washed often (think two boys) I was going to need something more durable. This is what I came up with.

Love it!
So now you can see what still needs to be done in my bathroom - trim work. (Oh, and that hunter green shower curtain is going to go too (read future project). It doesn't go with the softer hues the bathroom is now.) You can also see how close the mat is to the commode. Therefore washablity (is that a real word?) was a must! (Again think two boys!)
I really wanted the bath mat to coordinate with my bathroom, so I headed to The Salvation Army Thrift Store to get some cheap shirts to turn into scraps. With my color swatches in hand and five minutes to do the shopping, (Hubby was in the car with two very sleepy and cranky children) I headed in. Thankfully my Salvy's has all the clothing organized by color, I was able to quickly find a dozen or so shirts in the right colors and I headed to the register. Lucky me! I happened in on the day where all clothing was half off! So for less than $20 I got all the materials I needed to make this great rug.

After getting home (and getting the afore mentioned cranky kids to bed) I sat down and started cutting.

A rotary cutter makes things go so much faster!
 I cut the shirts into one and a half by six inch strips. It took me about an episode of Survivor to cut out all of the shirts. (Therefore it probably would have taken less time if I wasn't watching TV.) When I was done, this is what I had.

That's a big box of scraps!
Next, I realized that I forgot to leave one for the base of the bath mat. To Hubby's closet! (He's got too many old t-shirts anyway ;-) ). I cut two big rectangles figuring I'd make two bath mats. This is the time you learn that I tend to be a bit anal when it comes to some things. Measuring and cutting are two of them. So I measured and marked, with a sharpie, half inch marks a half inch apart from each other all over the shirt front.

Don't worry, you won't see the ugly, black, sharpie marks when it is finished
Then I carefully cut each line and  I weaved one strip through two of the holes all the way down the center line of the markings.
Here is where I differ from Rags By Sock Monkey. Having children (especially a toddler who likes to take things apart) and knowing that this would need to be washed, I decided that I would secure each row by sewing it down. (To the sewing machine!)
I used a simple running stitch to secure.
Pretty simple so far, right? Push fabric strips through, stitch down, repeat. When I got to the end, this is what it looked like.

I was surprised at how heavy it was getting.
About here I realized I did not have enough scraps to do all of the rows I had cut out. So, being the (sometimes) anal person I am I separated the remaining strips into piles of what I would need and trimmed the base down a bit, then continued. When it was done it looked like this.
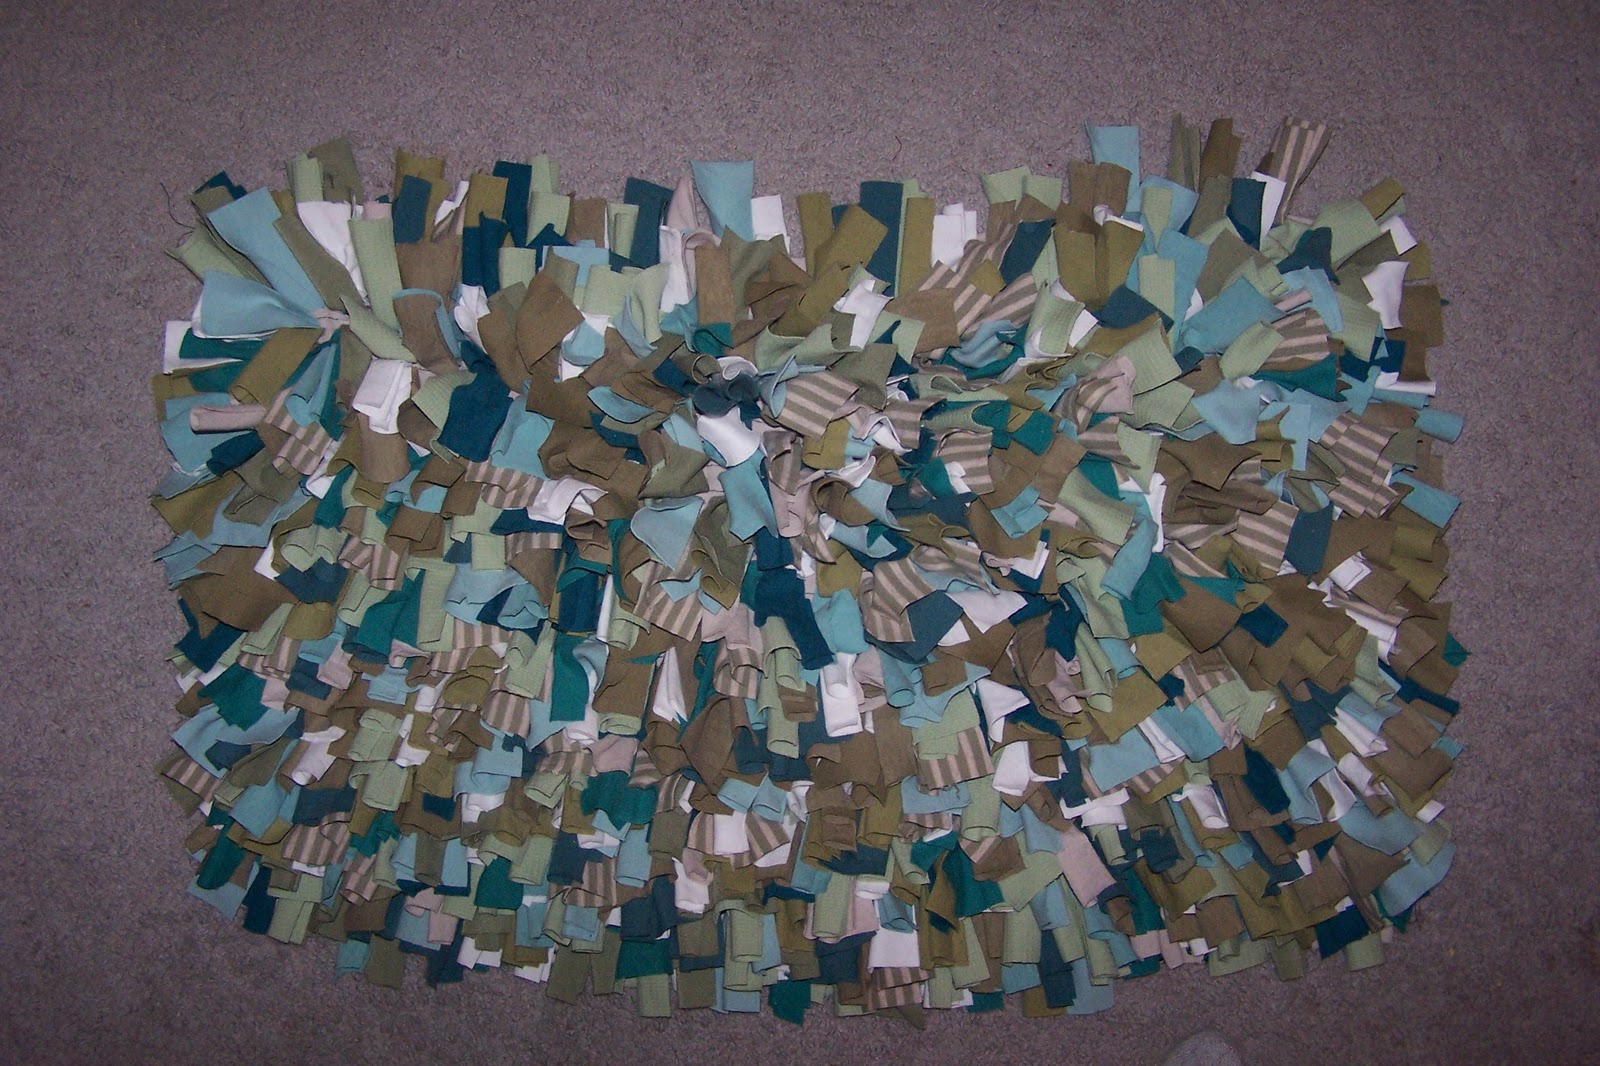
And even closer with out my ugly living room carpet.

And, just for fun, even closer.

Hubby was concerned that it would feel too lumpy and bumpy and would be uncomfortable to stand on. After giving it a try, even he thought it was great to stand on!  All in all, this was a fun project. I got thumbs up from Bubba, The Little Princess and even from the Hubby. Once more here it is in the bathroom.

I can't wait to try it out with some of the kids clothes. I think it would be great for a little rug by their beds or for a comfy reading spot.